Garden

Garden

Designing Climate-Resilient Gardens Through Microclimates, Soil Carbon, and Smart Plant Layering

Modern gardens are no longer just aesthetic spaces; they are living systems that must perform under increasing environmental stress. Heat waves, erratic rainfall, soil degradation, and biodiversity loss are forcing experienced gardeners to rethink traditional layouts. This article explores an advanced, climate-resilient garden design strategy that integrates microclimate engineering, soil carbon optimization, and intelligent plant layering to create gardens that thrive despite changing conditions.

This is not a beginner’s overview. It is a deep dive into how gardens can become self-regulating ecosystems with long-term productivity, resilience, and beauty.

Understanding Climate Stress at the Garden Scale

Climate change manifests in gardens through subtle but compounding pressures rather than single catastrophic events. Recognizing these stressors at the micro level is the first step toward resilient design.

Key Environmental Pressures Affecting Established Gardens

  • Increased temperature variability causing plant stress and premature bolting

  • Soil moisture extremes, alternating between compaction and erosion

  • Reduced pollinator activity due to habitat fragmentation

  • Nutrient volatility as microbial cycles are disrupted

Rather than fighting these forces with constant inputs, resilient gardens work with them by redirecting energy, water, and biological activity where they are most effective.

Microclimate Engineering: Turning Small Spaces Into Stable Systems

A microclimate is a localized atmospheric zone where temperature, humidity, and wind differ from surrounding areas. Skilled gardeners intentionally design these zones to protect sensitive plants and extend growing seasons.

Structural Elements That Shape Microclimates

Microclimates are not accidental; they are engineered through placement and material choice.

Key microclimate tools include:

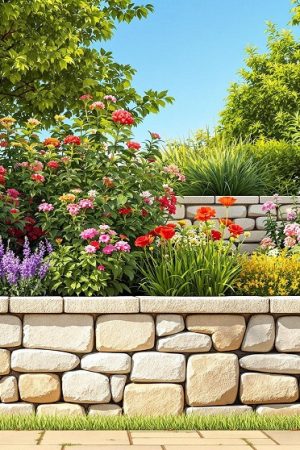
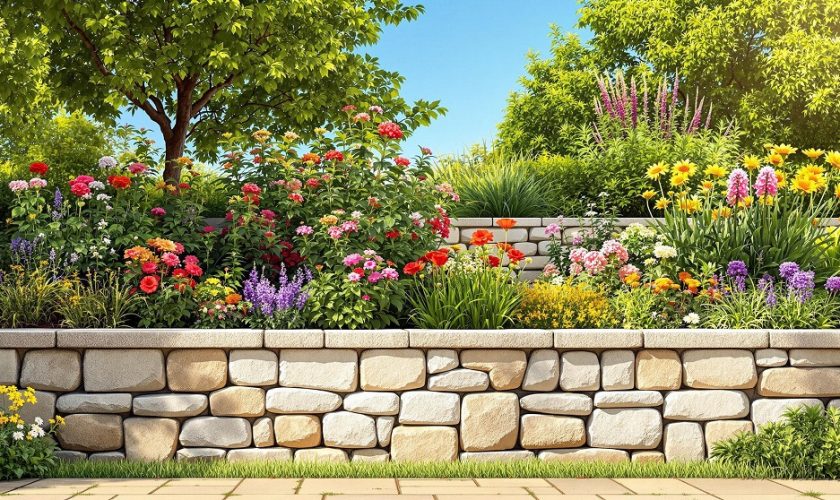
  • Thermal mass surfaces such as stone walls or water features that absorb heat during the day and release it at night

  • Windbreaks using dense hedges, layered shrubs, or trellised vines to reduce evapotranspiration

  • Sun traps formed by south-facing walls and enclosed courtyards

  • Shade modulation using deciduous trees that allow winter light while blocking summer heat

Each of these elements alters airflow and solar exposure, creating niches where plants experience less stress and more consistent conditions.

Microclimate Zoning for Plant Placement

Rather than grouping plants by aesthetics alone, resilient gardens organize them by climate tolerance bands.

Examples of strategic zoning:

  • Heat-sensitive greens planted on the leeward side of structures

  • Mediterranean herbs placed near reflective surfaces for added warmth

  • Moisture-loving plants located at the base of slopes where water naturally collects

This approach reduces maintenance while increasing survival rates during extreme weather events.

Soil Carbon: The Hidden Engine of Garden Resilience

Healthy soil is not just fertile; it is biologically active and carbon-rich. Soil carbon acts as a buffer against drought, flooding, and nutrient loss, making it one of the most powerful tools in climate-resilient gardening.

Why Carbon-Rich Soil Performs Better

Carbon improves soil function in multiple interconnected ways:

  • Enhances water retention by improving aggregate structure

  • Feeds microbial networks that regulate nutrient availability

  • Stabilizes soil temperature, protecting root systems

  • Reduces dependency on synthetic fertilizers

Gardens with high soil carbon recover faster from stress and maintain productivity under unpredictable conditions.

Advanced Carbon-Building Techniques

Experienced gardeners go beyond composting to build long-term carbon reserves.

Effective strategies include:

  • Biochar integration, pre-charged with compost tea to prevent nutrient lock-up

  • Continuous mulching using diverse organic materials rather than a single source

  • Root cycling, where deep-rooted perennials are periodically cut back to feed soil organisms

  • Minimal soil disturbance, preserving fungal networks critical for carbon storage

These methods work cumulatively, improving soil performance year after year rather than offering short-term gains.

Intelligent Plant Layering for Energy Efficiency

Plant layering mimics natural ecosystems, allowing gardens to capture sunlight, regulate moisture, and protect soil more effectively than flat planting schemes.

The Five Functional Layers of a Resilient Garden

Each layer serves a distinct ecological role:

  • Canopy layer: Trees that regulate temperature and wind

  • Sub-canopy layer: Shrubs providing habitat and food sources

  • Herbaceous layer: Dynamic plants that respond quickly to seasonal changes

  • Ground cover layer: Living mulch that suppresses weeds and retains moisture

  • Root layer: Plants that aerate soil and mine nutrients from deeper horizons

When properly balanced, these layers reduce evaporation, suppress pests naturally, and distribute resources efficiently.

Dynamic Density Management

Unlike static designs, resilient gardens require adaptive thinning and reinforcement.

Best practices include:

  • Removing underperforming plants to reduce competition during drought

  • Increasing density in exposed areas to protect soil

  • Allowing self-seeding in stable microclimates to enhance genetic resilience

This flexibility transforms the garden into a responsive system rather than a fixed layout.

Water Logic: Redirecting, Not Resisting, Natural Flow

Climate-resilient gardens treat water as a design partner. Instead of relying solely on irrigation, they capture, slow, and reuse rainfall within the landscape.

Passive Water Management Techniques

  • Swales and contour beds that guide water horizontally

  • Permeable paths allowing infiltration rather than runoff

  • Plant-based wicking zones that draw moisture upward during dry periods

These features reduce erosion while ensuring plants receive water where and when it is needed most.

Biodiversity as Structural Support

Biodiversity is often discussed in terms of wildlife value, but in resilient gardens it functions as structural insurance.

Diverse plantings:

  • Reduce pest outbreaks by disrupting monocultures

  • Extend flowering periods for pollinators

  • Stabilize yields across unpredictable seasons

A resilient garden does not rely on a single species to perform a critical function; it distributes responsibility across many.

Long-Term Observation and Adaptive Management

Resilient gardens are never finished. They evolve through continuous observation, data-informed adjustments, and seasonal recalibration.

Experienced gardeners track:

  • Soil moisture patterns

  • Plant stress indicators

  • Pollinator visitation trends

  • Seasonal microclimate shifts

This feedback loop allows the garden to improve its own performance over time, often with fewer external inputs.

FAQ: Advanced Climate-Resilient Gardening

How long does it take to see results from soil carbon-building practices?

Noticeable improvements in water retention and plant vigor often appear within one growing season, but full benefits typically develop over two to three years of consistent application.

Can microclimate design work in small urban gardens?

Yes. Even balconies and courtyards can support microclimates through reflective surfaces, wind barriers, and strategic plant placement.

Is biochar safe for all soil types?

Biochar is generally safe, but it should always be pre-charged with nutrients and used in moderation, especially in sandy or low-organic soils.

How do I prevent layered plantings from becoming overcrowded?

Regular observation and selective pruning are essential. Treat plant density as adjustable rather than permanent.

Does a climate-resilient garden require more planning than a traditional one?

Initial planning is more intensive, but long-term maintenance is often significantly lower due to improved system efficiency.

Can ornamental gardens benefit from these strategies?

Absolutely. Climate resilience enhances flowering duration, foliage health, and overall visual stability.

What is the most common mistake gardeners make when aiming for resilience?

Focusing on individual plants rather than the interactions between soil, water, structure, and biodiversity.
read more
Garden

How to Remove Thatch from Your Lawn

Thatch, the layer of organic material that accumulates between the grass blades and the soil surface, can become a significant concern for lawn care enthusiasts. While a thin layer of thatch can be beneficial, providing insulation and moisture retention, excessive thatch can hinder grass growth, leading to various problems such as poor drainage, increased pests, and disease. This guide will explore effective methods to remove thatch from your lawn, ensuring a healthier and more vibrant yard.

Understanding Thatch

Before delving into removal techniques, it is essential to understand what thatch is and how it forms. Thatch consists of dead grass, roots, and other organic debris that can accumulate over time. It typically builds up in lawns that receive excessive fertilizer, inadequate watering, or limited aeration. A layer of thatch greater than half an inch can create problems for your lawn, such as suffocating the grass roots and preventing water and nutrients from penetrating the soil.

Signs of Thatch Buildup

Identifying the presence of excessive thatch is crucial for taking appropriate action. Look for the following signs:

  • Poor Drainage: If water tends to pool on the surface rather than being absorbed, it may indicate thatch buildup is obstructing water penetration.
  • Moss Growth: Moss growing in your lawn can signal poor drainage and excessive thatch, as moss thrives in damp, shady conditions.
  • Grass Decline: If your grass appears thin, weak, or patchy, it may struggle to grow due to the suffocating layer of thatch.
  • Pests and Disease: An overabundance of thatch can attract pests and contribute to the development of diseases, leading to further lawn deterioration.

Steps to Remove Thatch

Once you’ve determined that your lawn has excessive thatch, you can take several steps to effectively remove it.

1. Assess Your Lawn

Before beginning the removal process, evaluate your lawn’s condition. Check for other underlying issues, such as poor soil health or improper watering practices, that may contribute to thatch accumulation. Addressing these factors will improve your overall lawn care strategy.

2. Timing Your Thatch Removal

The timing of thatch removal is crucial for minimizing stress on your lawn. The best time to dethatch is during the growing season, typically in early spring or early fall, depending on your grass type. Cool-season grasses benefit from dethatching in early spring or early fall, while warm-season grasses thrive when dethatched in late spring or early summer.

3. Manual Removal Techniques

If the thatch layer is thin (less than half an inch), you may opt for manual removal techniques:

  • Raking: Use a stiff-tined rake to gently pull up thatch and debris from the lawn surface. This method is effective for small areas but can be labor-intensive for larger lawns.
  • Thatching Rake: A thatching rake, equipped with sharp, curved tines, can make the process more efficient. This tool is designed specifically for removing thatch, allowing you to work through the layer more effectively.

4. Mechanical Dethatching

For thicker layers of thatch (greater than half an inch), mechanical dethatching is often necessary. There are two primary options:

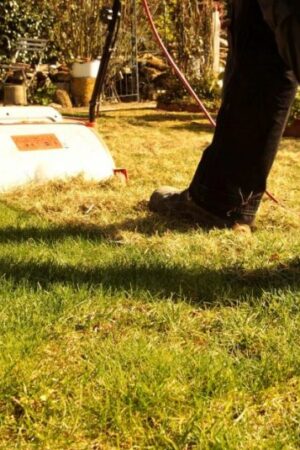
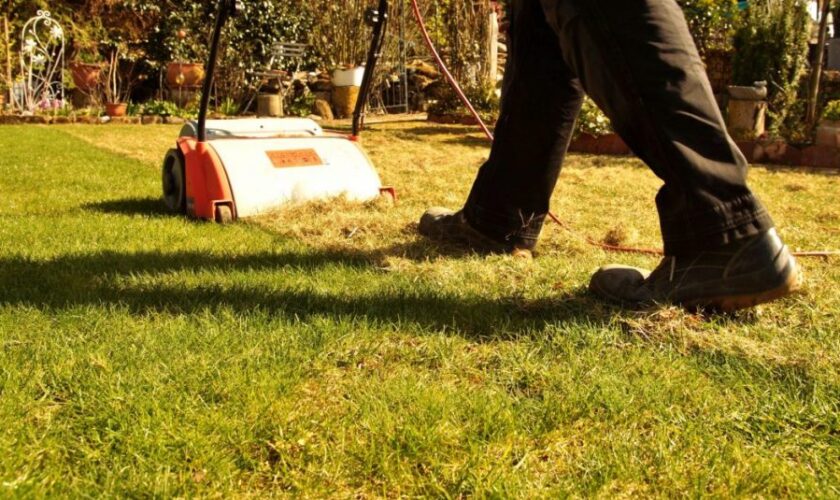
  • Dethatching Machine: Many garden centers and hardware stores offer dethatching machines for rent. These machines use rotating blades to penetrate the thatch layer, pulling up the debris and allowing it to be collected easily. Follow the manufacturer’s instructions for optimal use, and ensure you operate the machine at a slow pace to achieve thorough results.
  • Power Rake: A power rake is a more advanced tool that resembles a lawn mower but has specialized tines designed for thatch removal. Like dethatching machines, power rakes can be rented from equipment suppliers or garden centers. This method is effective for larger lawns and significantly reduces the effort required for manual raking.

5. Clean Up the Debris

After dethatching, it’s crucial to clean up the removed thatch and debris from your lawn. Rake up the loose material and either compost it (if it’s not diseased) or dispose of it properly. Leaving thatch on the lawn can lead to more problems, as it may decompose and contribute to additional layers of thatch.

6. Aerate Your Lawn

After removing thatch, consider aerating your lawn. Aeration involves perforating the soil with small holes to allow air, water, and nutrients to penetrate the grass roots more effectively. This process encourages healthy grass growth and helps to prevent future thatch buildup.

7. Fertilize and Water

Once your lawn is dethatched and aerated, give it a boost with proper fertilization and watering. Apply a balanced, slow-release fertilizer to provide the necessary nutrients for recovery. Ensure you water adequately to encourage deep root growth, particularly in the weeks following dethatching.

8. Monitor Your Lawn

After completing the dethatching process, monitor your lawn’s health over the following weeks and months. Look for signs of improvement, such as thicker grass and better drainage. Maintain proper mowing, watering, and fertilization practices to support your lawn’s recovery and prevent future thatch buildup.

Preventing Future Thatch Buildup

To keep thatch from becoming an issue in the future, consider the following prevention tips:

  • Proper Mowing: Mow at the appropriate height for your grass type and avoid cutting more than one-third of the grass blade at once. This practice encourages healthy grass growth and minimizes stress.
  • Balanced Fertilization: Apply fertilizers based on soil tests to avoid over-fertilization, which contributes to thatch buildup. Focus on organic options when possible, as they break down more easily.
  • Adequate Watering: Water deeply and infrequently to encourage deep root growth and prevent the conditions that lead to thatch buildup. Avoid overwatering, which can exacerbate the problem.
  • Regular Aeration: Aerate your lawn annually or biannually to improve soil structure and prevent compaction, making it less prone to thatch accumulation.

By understanding the importance of thatch management and implementing these techniques, you can enjoy a healthier, more resilient lawn. A well-maintained lawn not only enhances your outdoor space but also contributes to the overall health of your local ecosystem. With diligence and care, your lawn can thrive and provide a beautiful green oasis in your yard.

read more
Garden

Essential Tools Every Gardener Needs: A Comprehensive Guide

Gardening is a rewarding hobby that not only nurtures our connection to nature but also provides fresh produce and beautiful landscapes. Whether you’re an experienced gardener or just starting out, having the right tools can significantly enhance your gardening experience. This guide will explore the essential tools every gardener should consider, ensuring you are well-equipped for planting, maintaining, and harvesting your garden.

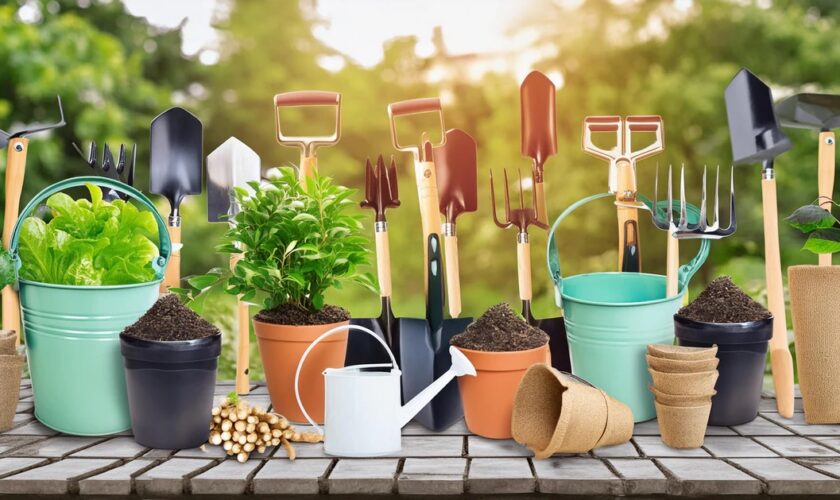
1. Hand Tools

Hand tools are the backbone of any gardener’s toolkit. They are essential for a variety of tasks, from digging to planting and weeding.

Trowel

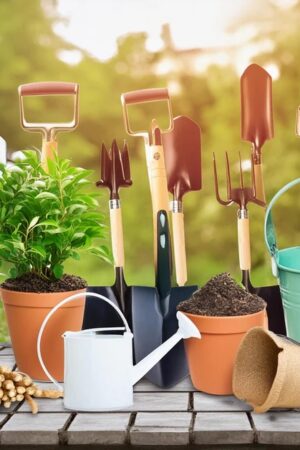
A trowel is a versatile tool that every gardener needs. It features a pointed, scooped metal blade that is perfect for digging small holes, planting seeds, and transplanting seedlings. Choose a trowel with a comfortable grip, as you’ll be using it frequently.

Hand Fork (Cultivator)

A hand fork, or cultivator, is invaluable for breaking up soil and aerating garden beds. It helps to loosen compacted soil and mix in compost or fertilizers. This tool is particularly useful when preparing a new bed or maintaining existing ones.

Pruning Shears

Pruning shears are essential for maintaining the health of your plants. They allow you to trim dead or diseased branches and shape shrubs and flowers for better growth. Look for a pair that fits comfortably in your hand and has a sharp blade for clean cuts.

Weeder

A weeder is specifically designed to remove unwanted weeds from your garden. It often features a long, narrow blade or a forked end that can easily slip beneath the weed’s root system. This tool is crucial for keeping your garden tidy and healthy without damaging nearby plants.

2. Digging Tools

For larger planting tasks, digging tools are necessary. These tools are designed to handle more demanding soil work.

Garden Spade

A garden spade is a larger, flat-bladed tool perfect for digging, edging, and turning soil. Its sharp edge makes it effective for breaking up compacted soil, and it can also be used to create straight edges for garden beds.

Garden Fork

A garden fork, also known as a pitchfork, is ideal for turning over soil, mixing in compost, and aerating the ground. Its sturdy tines penetrate hard soil easily, making it a valuable tool for preparing beds before planting.

3. Watering Tools

Proper watering is crucial for the health of your garden, making watering tools indispensable.

Garden Hose

A good-quality garden hose is essential for watering your plants. Look for one that is durable, flexible, and long enough to reach all areas of your garden. Consider investing in a hose reel to keep it organized and prevent tangling.

Watering Can

For smaller gardens or indoor plants, a watering can is a practical choice. Opt for a can with a removable spout that allows for precise watering, especially when tending to delicate seedlings or potted plants.

Spray Nozzle

A spray nozzle attaches to your garden hose and allows for adjustable water flow, from a gentle mist for seedlings to a strong stream for deeper watering. This flexibility can help you conserve water and target specific areas of your garden effectively.

4. Safety Gear

Safety should always be a priority while gardening. Proper gear protects you from injuries and enhances your comfort.

Gloves

A good pair of gardening gloves is essential for protecting your hands from thorns, blisters, and dirt. Choose gloves made from durable materials with a comfortable fit. Some gloves are specifically designed for tasks like pruning or digging, providing extra protection where needed.

Kneeling Pad

Gardening can be tough on your knees, especially when planting or weeding. A kneeling pad provides cushioning and support, making it more comfortable to work at ground level. Look for one that is durable and easy to clean.

Sun Protection

If you’re spending long hours in the garden, protecting yourself from the sun is vital. A wide-brimmed hat, sunglasses, and sunscreen are essential tools for safeguarding your skin from harmful UV rays.

5. Harvesting Tools

Once your hard work pays off, harvesting tools will help you gather the fruits (and vegetables) of your labor.

Harvesting Knife

A sharp harvesting knife is perfect for cutting fruits and vegetables from their plants without damaging the surrounding foliage. Look for a knife with a comfortable grip that allows for precision cutting.

Baskets or Buckets

Gathering your harvest requires containers. Baskets or buckets are ideal for collecting fruits, vegetables, and flowers. Choose a size that is manageable for you, and consider using breathable materials for fruits and vegetables to prevent spoilage.

6. Additional Useful Tools

In addition to the essentials, several other tools can make gardening easier and more enjoyable.

Garden Cart

A garden cart is a convenient way to transport tools, soil, and plants around your garden. It can save your back and make moving heavy items much simpler.

Soil Tester

A soil tester can help you monitor the pH and nutrient levels in your garden soil. Understanding your soil’s health allows you to amend it effectively, ensuring your plants thrive.

Garden Journal

Keeping a garden journal is an invaluable tool for tracking your planting dates, growth progress, and any challenges you encounter. This record can provide insights that help improve your gardening practices over time.

Final Thoughts

Equipping yourself with the right tools can significantly enhance your gardening experience. From hand tools for everyday tasks to safety gear and harvesting implements, having the essentials on hand will help you cultivate a thriving garden. As you invest in these tools, consider your gardening style and preferences to ensure your toolkit meets your unique needs. Happy gardening!

read more