October 2024

Home

How to Create a Pest Control Plan for Your Home: A Step-by-Step Guide

Creating an effective pest control plan is essential for maintaining a healthy and comfortable living environment. Pests can not only damage property but also pose health risks to you and your family. A well-structured pest control plan can help you proactively manage potential infestations, ensuring your home remains a safe haven. Here’s a detailed guide on how to create an effective pest control plan tailored to your specific needs.

Understanding Your Pest Control Needs

The first step in creating a pest control plan is to understand the specific needs of your home. Different environments attract different pests, and awareness of your unique situation is key.

  1. Identify Common Pests: Start by identifying the types of pests that are prevalent in your area. Common household pests include ants, cockroaches, termites, rodents, and bed bugs. Research local pest trends, as certain species may be more active during specific seasons.
  2. Assess Your Home’s Vulnerabilities: Conduct a thorough inspection of your property. Look for potential entry points such as cracks in walls, gaps around windows and doors, and any holes in the foundation. Pay attention to areas that may provide food or shelter for pests, like kitchens, basements, and attics.

Establishing a Monitoring System

Once you have a clear understanding of the pests that may invade your home, the next step is to set up a monitoring system.

  1. Regular Inspections: Schedule regular inspections of your home, ideally every few months. During these inspections, check for signs of pest activity such as droppings, nests, or damage to structures.
  2. Use Traps and Baits: Place traps or bait stations in areas where pests are likely to enter or travel. Sticky traps can be effective for monitoring insect populations, while bait stations can help control rodent activity.
  3. Keep a Log: Maintain a log of your inspections and any signs of pest activity. This record can help identify patterns and determine the best course of action when an infestation occurs.

Implementing Preventive Measures

Preventing pests from entering your home is one of the most effective ways to manage infestations. Here are several strategies to consider:

  1. Seal Entry Points: Use caulk or weather stripping to seal cracks, gaps, and holes around windows, doors, and the foundation. Pay special attention to utility lines and plumbing access points, as these can also serve as entry points.
  2. Maintain Cleanliness: Regular cleaning is essential for reducing pest attraction. Keep kitchen surfaces clean, store food in airtight containers, and promptly clean up spills. Declutter your home to eliminate hiding spots for pests.
  3. Manage Outdoor Spaces: Landscaping can influence pest activity. Trim overgrown plants, remove standing water, and keep firewood stored away from the home. These practices will help reduce the likelihood of pests making their way indoors.

Choosing Pest Control Methods

When pests do invade, it’s important to have a variety of control methods at your disposal. Consider the following options:

  1. Natural Remedies: Many homeowners prefer natural pest control methods. Essential oils like peppermint, lavender, and tea tree oil can repel certain insects. Vinegar and baking soda can also be effective for managing pests without harsh chemicals.
  2. Chemical Solutions: If natural remedies aren’t sufficient, consider using chemical solutions. Be sure to select products that are specifically designed for the type of pest you’re dealing with, and follow all label instructions carefully. Always prioritize safety, especially if you have children or pets.
  3. Integrated Pest Management (IPM): This holistic approach combines multiple strategies to manage pests effectively. IPM focuses on understanding pest life cycles, using traps and baits, and applying pesticides as a last resort. It emphasizes long-term prevention and environmental health.

Working with Professionals

In some cases, professional pest control services may be necessary. Here’s how to choose a reliable service:

  1. Research Local Companies: Look for pest control companies in your area with positive reviews and a solid reputation. Check their credentials and ensure they are licensed and insured.
  2. Ask Questions: Don’t hesitate to ask potential providers about their methods, products, and pricing. Understanding their approach will help you feel more confident in your choice.
  3. Schedule Regular Treatments: Once you select a pest control service, consider setting up regular treatments. Routine visits can help catch any potential infestations early and maintain a pest-free environment.

Education and Awareness

One of the most powerful tools in pest management is education. Equip yourself and your family with knowledge about pests and prevention techniques.

  1. Stay Informed: Keep up to date with local pest trends and seasonal changes that may affect pest activity. Many local extension services offer resources and information about managing pests.
  2. Teach Your Family: Share pest prevention strategies with your family. Teaching children to clean up after themselves and report any signs of pests can create a more proactive household.

Reviewing and Adjusting Your Plan

Finally, it’s important to regularly review and adjust your pest control plan. As seasons change and your home’s environment evolves, so too should your approach to pest management.

  1. Evaluate Effectiveness: After implementing your pest control measures, assess their effectiveness. Are you seeing fewer pests? Is your monitoring system catching issues early?
  2. Make Necessary Adjustments: If certain methods aren’t working, be open to adjusting your strategy. This may include trying new products, changing monitoring techniques, or addressing any new vulnerabilities in your home.

A Proactive Approach to Pest Control

Creating a comprehensive pest control plan for your home requires careful consideration and ongoing effort. By understanding the risks, implementing preventive measures, and remaining vigilant, you can effectively manage pests and maintain a comfortable living space. A well-structured plan not only protects your home but also promotes peace of mind, allowing you to focus on what truly matters: enjoying your living environment.
read more
Home

How to Properly Maintain Your Water Heater

Maintaining your water heater is essential for ensuring its efficiency, extending its lifespan, and preventing costly repairs. Whether you have a traditional tank model or a modern tankless system, regular maintenance can keep your water heater running smoothly and efficiently. Here’s a detailed guide on how to properly maintain your water heater.

1. Regular Inspection

Performing regular inspections is the first step in maintaining your water heater. This allows you to catch potential issues before they escalate into significant problems.

Check for Leaks

Inspect the area around your water heater for any signs of leaks. Look for puddles, damp spots, or rust around the unit. If you notice any leaks, it’s crucial to address them immediately, as they can lead to more significant damage and increased water bills.

Examine the Pressure Relief Valve

The pressure relief valve is a safety feature designed to prevent excessive pressure buildup in the tank. To test it, lift the lever to release some water. If water doesn’t flow freely or the valve leaks after testing, it may need to be replaced.

2. Flush the Tank

Flushing your water heater is vital for removing sediment buildup, which can reduce efficiency and damage the unit over time. Sediment, primarily composed of minerals, can accumulate at the bottom of the tank and lead to overheating and corrosion.

Steps to Flush the Tank

  1. Turn Off the Power: For electric models, switch off the circuit breaker. For gas models, turn the thermostat to the “pilot” setting.
  2. Connect a Hose: Attach a garden hose to the drain valve at the bottom of the tank, directing the other end to a floor drain or outside.
  3. Open the Drain Valve: Carefully open the drain valve, allowing water to flow out. Be cautious, as the water may be hot.
  4. Flush the Tank: Once the tank is empty, briefly turn on the cold water supply to stir up any remaining sediment. Let it drain again until the water runs clear.
  5. Close the Valve and Refill: Close the drain valve, disconnect the hose, and turn the power back on. Allow the tank to refill before using hot water.

Flushing the tank should be done at least once a year, or more frequently if you live in an area with hard water.

3. Check the Anode Rod

The anode rod is a crucial component in preventing tank corrosion. It is made of magnesium or aluminum and is designed to attract corrosive elements in the water, protecting the tank from rust.

Inspecting the Anode Rod

  1. Locate the Rod: The anode rod is usually located on the top of the water heater. It may require some tools to access, as it can be secured with a hex head screw.
  2. Assess Condition: Remove the rod and inspect it for signs of corrosion or significant wear. If the rod is less than half an inch thick or heavily corroded, it’s time to replace it.
  3. Replace as Needed: Anode rods should be replaced every 3 to 5 years, depending on water quality and usage.

4. Adjust the Temperature Setting

Setting the right temperature for your water heater not only enhances safety but also improves efficiency. The recommended temperature for most households is around 120°F (49°C).

Benefits of Proper Temperature

  • Energy Savings: Lowering the temperature can reduce energy costs, as less energy is required to heat the water.
  • Scalding Prevention: A lower temperature reduces the risk of scalding, making it safer for children and the elderly.

Adjusting the Temperature

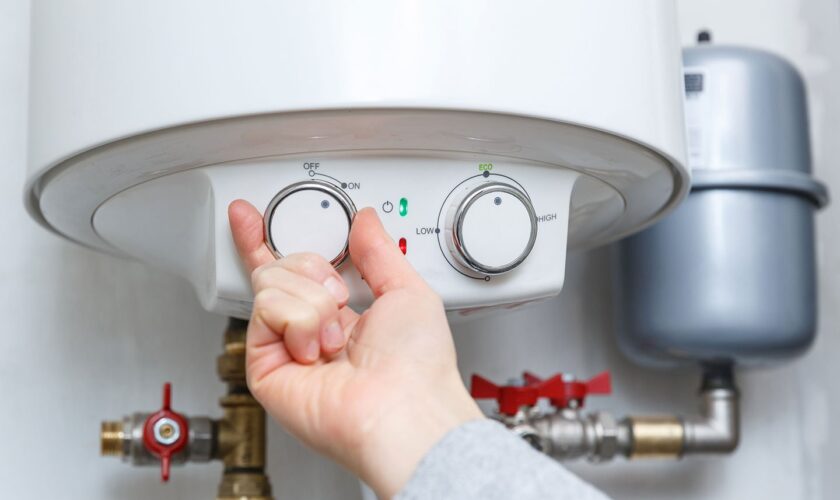
  1. Locate the Thermostat: For electric heaters, there are usually two thermostats—one for the upper heating element and one for the lower. For gas heaters, the thermostat is typically a dial on the front.
  2. Make Adjustments: Adjust the temperature to the desired level. If you have an electric model, check both thermostats to ensure they are set to the same temperature.

5. Insulate Your Water Heater

Insulating your water heater can improve efficiency by reducing heat loss, especially if your heater is in an unconditioned space like a garage or basement.

Insulation Options

  1. Blanket Insulation: Purchase an insulation blanket specifically designed for water heaters. Follow the manufacturer’s instructions for installation.
  2. Pipe Insulation: Insulating the hot water pipes leading from the heater can also reduce heat loss and improve delivery times.

6. Schedule Professional Maintenance

While many maintenance tasks can be performed by homeowners, scheduling regular professional maintenance is crucial for ensuring the optimal performance of your water heater.

Benefits of Professional Service

  • Thorough Inspection: Professionals can identify potential issues that may go unnoticed during a routine inspection.
  • Expert Cleaning: They can perform a thorough flush of the tank and check all components, including the pressure relief valve and anode rod.
  • Warranties: Many manufacturers require regular maintenance to keep warranties valid, so professional servicing can help protect your investment.

7. Monitor for Signs of Trouble

Being vigilant for any signs of trouble can help catch issues early. Look for:

  • Unusual Noises: Sounds like popping or rumbling may indicate sediment buildup.
  • Inconsistent Water Temperature: If your water isn’t heating properly, it may be time for a check-up.
  • Rusty Water: Rust-colored water may signal corrosion inside the tank.

If you notice any of these signs, consult a professional plumber to assess the situation.

Maintaining a Reliable Water Heater

Proper maintenance of your water heater is essential for ensuring its efficiency, longevity, and safe operation. Regular inspections, flushing the tank, checking the anode rod, adjusting temperature settings, insulating the unit, and scheduling professional maintenance are all crucial steps. By investing time and effort into these maintenance practices, you can enjoy reliable hot water for years to come while minimizing the risk of costly repairs.

read more
Home

Paver Contractors vs. DIY: Why Professional Installation Matters

Pavers are a great way to transform the look of your outdoor area. They can be used for driveways, patios, pool areas, and walkways. Many homeowners are faced with the decision of whether to hire professional paver contractors or do it themselves. Although DIY installation may appear to be the most cost-effective option, it is not always the best choice. Why it matters.

Expertise and Experience

Expertise and experience are two of the biggest advantages of hiring a professional paver contractor. They have worked with a variety of materials and pavers for many years. They can deal with issues such as uneven terrain, drainage problems, and soil conditions.

DIYers may not have the same experience or knowledge. Lack of experience, even with online guides and tutorials, can cause mistakes. Poor installation may cause pavers to sink or shift over time. This can lead to costly repairs.

Proper Tools and Equipment

The right equipment and machinery are used by professional paver contractors. The tools required for paver installation can be expensive and highly specialized. These tools are used to ensure that pavers are installed evenly, the base compacted properly, and that the project is completed accurately.

You may have to purchase or rent these tools if you decide to do a DIY job, and this can increase the cost. Using the wrong equipment, or skipping steps like compacting the base properly, can make your paver installation less durable.

Time and Efficiency

The installation of pavers can be laborious and time-consuming. Site preparation, laying of the base, leveling of the surface, arrangement, and sealing of the pavers are all part. Professional crews can finish the project much quicker than DIY projects, usually in just a few days. They know how to avoid the most common mistakes, which minimizes delays.

DIY projects, however, can take months or even weeks, especially when you have to balance the project with your other obligations. The longer a project takes, the greater the chance of making mistakes or losing momentum.

Long-Term Durability

Professionals install pavers, and you get a job well done, you benefit from warranties covering both the materials as well as the installation. Contractors adhere to industry standards when installing pavers, which ensures durability and resistance against wear and tear. DIY projects can save you money, but they often lack the durability and quality of a professionally installed surface.

Although DIY paver installations may be tempting because they are cheaper, professional paver installers provide expertise, the right equipment, efficiency and durability over time that DIY projects cannot match. Professional installation will ensure a long-lasting, beautiful and functional outdoor space. This will increase the value of your house for many years.

This post was written by a professional at Apexx Enterprise LLC. Adam Ortega founded the company https://apexxenterprise.com/, in 2016 at only 20 years old. Mr. Ortega has become a licensed general contractor Tucson in the state of Arizona like his father and grandfather before him. Apexx Enterprise LLC is licensed, bonded, and insured and it is available for review at the Better Business Bureau. Apexx Enterprise LLC has won many achievements within the Home Advisor platform and we have multiple reviews as well. Their Mission Statement – “Our crew at Apexx Enterprise will perform the highest quality construction services for our customers. We aim to achieve our mission through total service satisfaction and by delivering our services while maintaining the highest levels of professionalism, integrity, and honesty.”

read more